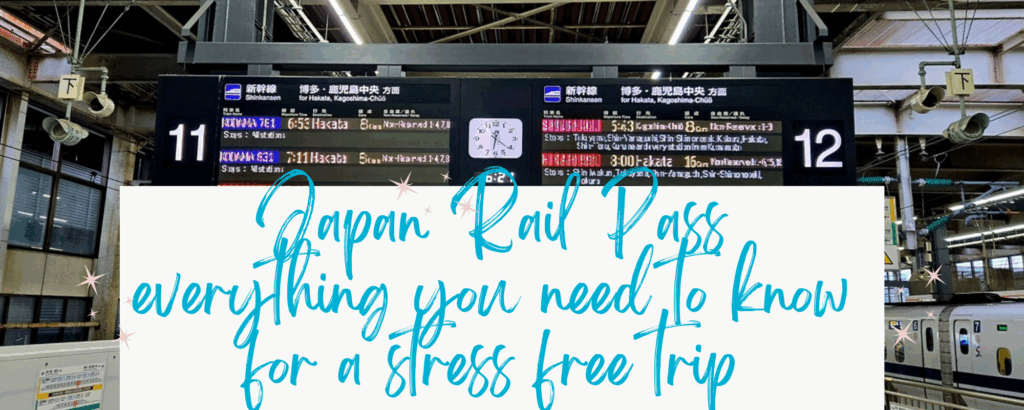
We recently got back from a 23-day long journey to Japan where we travelled in a loop from Tokyo to Kanazawa to Kyoto to Hiroshima to Nagasaki to Osaka and back to Tokyo and many other cities and sites in between! One thing that made all that moving around so much easier, the Japan Rail Pass. However, it can be somewhat overwhelming to figure out if you should buy it, where to buy, how to pick it up, and how to use properly. Our hope is after reading this post, you will have a clear understanding on whether the Japan Rail Pass is right for you, and if it is, how to go about buying and using it in the most effective way.
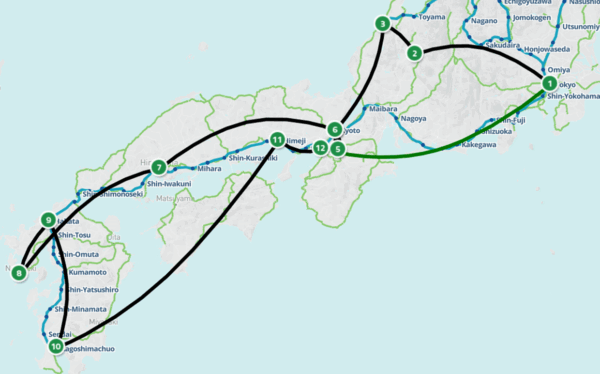
Screenshot via jrpass.com
Our Japan Rail Pass Route
- What is the Japan Rail Pass?
- Are there other JR Pass options besides the nationwide pass?
- How do I determine if the JR Pass is worth it for me?
- Where can I buy the JR Pass?
- When to Buy the JR Pass?
- How to Buy the JR Pass?
- How to Reserve Seats in Advance?
- How do I pick up my JR Pass Upon Arrival in Japan?
- How do I issue my seat reservation tickets?
- Can I change my JR train reservations?
- Once I have my reservation tickets, how do I use them?
- Can I ride trains with my JR Pass and no seat reservations?
- Are there certain JR trains I cannot take with the JR Pass?
- What happens if I lose my JR Pass while I am in Japan?
- Related Content
- Share This Article!
- Leave A Comment Cancel reply
What is the Japan Rail Pass?
It’s a rail pass offered to foreign travelers by Japan Rail (“JR”) which covers most JR trains as well as the Miyajima Ferry near Hiroshima. By purchasing this pass, you won’t need to purchase train tickets every time you move around in Japan which can reduce a lot of stress for foreign travelers. You’ll have the option of three periods when purchasing: 7, 14, or 21 consecutive days. Your first day will be the day you first put your pass through a machine at a train station, no matter what time you do that at, and your pass will then be valid until the end of the 7th, 14th, or 21st day depending on the duration you purchased.
Are there other JR Pass options besides the nationwide pass?
Yes, there are over 20 different Regional Passes which have multiple duration options. These passes allow you to travel on JR trains within that region for your specified duration. If you have a concrete plan on where you are going to be during your time in Japan or will only be visiting a few regions, it may make a lot of sense to purchase a combination of these regional passes instead of the full country pass. One downside: You will have to pay attention to the region(s) you are in each day and make sure you’re using the correct ticket vs. using the single country-wide pass.
How do I determine if the JR Pass is worth it for me?
Besides the convenience it offers foreign travelers, it also can save you a lot of money! We purchased a 21-day pass, which cost 100,000 JPY (in March 2025) which converted at the time to ~$675 USD per person. That is a lot of money to spend without knowing if it is worth it. There are a number of calculators out there that help determine if you will save money or not, but the one we like the most is this one. We input our main stops over our trip as an example. As of this writing, the cost of individuals tickets would have been 116,030 JPY. Given our passes only cost 100,000 JPY, we saved 16,030 JPY or over $100 each! That also doesn’t include the cost of what we would have paid for our local JR train rides around Tokyo, Osaka, and Kyoto. What makes this calculator great is easy input of the JR Stations you are planning to use (Google Maps directions will help you determine which stations you need), the ability to toggle between the 7, 14, and 21 day pass options, and the ability to toggle between currencies so you can see how much you are saving in your own currency.
If you are primarily staying in the Tokyo area, the JR Pass is not going to be the most cost-effective option for you. Instead, consider individual JR train tickets for day trips outside the city and Suica or Pasmo for subways and local trains (more about those later).
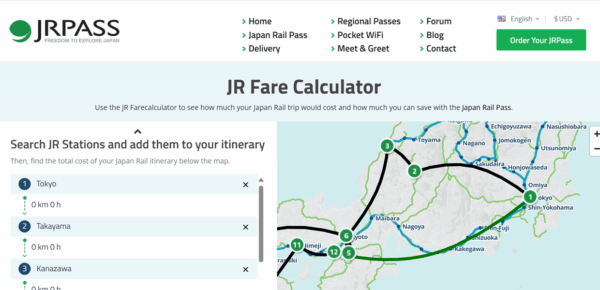
Screenshot via jrpass.com
JR Pass Calculator
Where can I buy the JR Pass?
If you determined the JR Pass is worth buying, where should you buy the JR Pass? There are several websites out there that offer the ability to get a JR Pass and they all likely will work just fine but there is only one website where you can purchase the pass AND have the ability to reserve seats before you arrive in Japan: https://www.japanrailpass-reservation.net/. This is the one and only official JR Pass website. You can purchase it at other websites, but you won’t have the ability to reserve your seats until after you arrive in Japan and pick up your pass which can add a level of stress during busy times where seats fill up.
Please note this website only operates from 4:00am – 11:30pm, Japan time. That means if you are on the east coast of the USA, you won’t be able to access the site until mid-afternoon each day as a result.
When to Buy the JR Pass?
If you take our advice above and purchase from the official website, you can purchase your JR Pass 30 days before your planned start date. For example, if you planned to start using your pass on May 25th, you would be able to purchase it starting on April 24th mid-afternoon in the USA. Other websites allow you to purchase your pass up to 90 days in advance, but again, you are not going to be able to do anything with that pass until after you arrive in Japan.
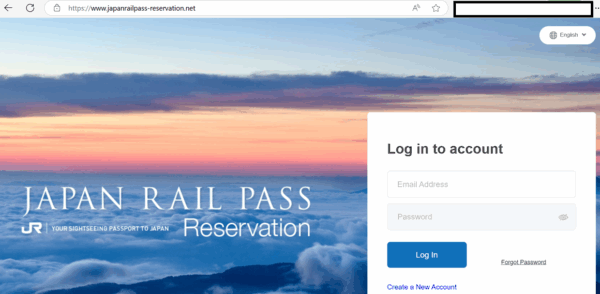
Screenshot via japanrailpass-reservation.net
Official Reservation Website
How to Buy the JR Pass?
It’s actually quite simple to purchase. You’ll enter your planned start date, which is the date you will first use your JR Pass (that might be on arrival at the airport, or it might be a day or several days later depending on your itinerary). For our trip, we selected a start date for the day after we arrived in Japan. We had a 23-day trip, so we needed to do something else for 2 days (first and last day) given the maximum duration of a JR Pass is 21 days. For the first day, we purchased a separate Skyliner + 24 hour Tokyo Subway Pass. We used this to get from Narita Airport to Tokyo and for the various Tokyo subways before we boarded our first JR train to Takayama.
After you select your planned start date, you then choose which duration you want: 7, 14, or 21 days. Next, you must choose the “Type of Car” – Ordinary or Green. The Green car is essentially the equivalent of “First Class” and gives you a little more space and larger windows. Of course, it also costs more money. We chose Ordinary and were super happy with it. We had plenty of space (these seats are not like airplane seats) and our seating area was always super clean and comfortable. I can’t imagine ever paying extra for the green cars, but if you’re looking for a little extra comfort it could be a good fit for you! Next, you’ll need to enter your planned arrival location, which for most people is likely Narita International Airport. You’ll then complete the first screen by selecting the number of adults and children on your trip. Hit “Next” to move to the next screen.
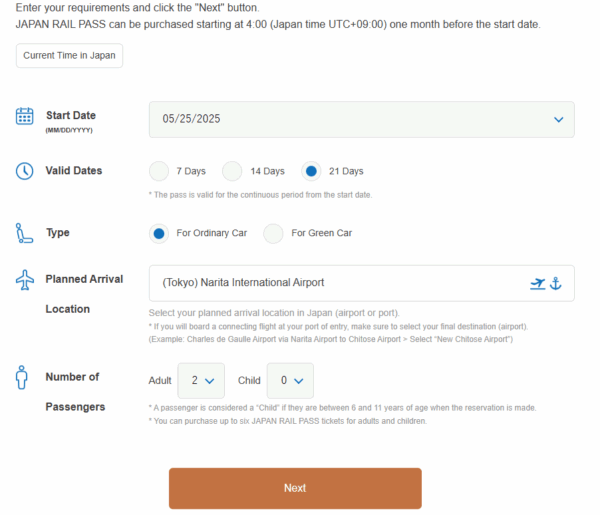
Screenshot via japanrailpass-reservation.net
Purchasing a Pass Step 1
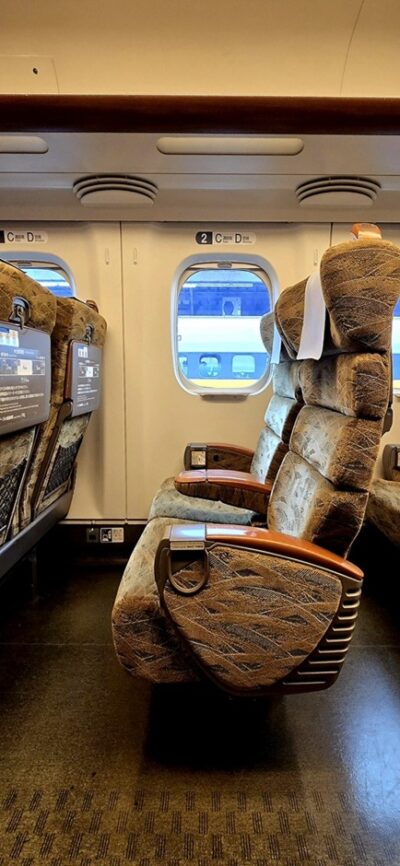
Typical seat in the ordinary car
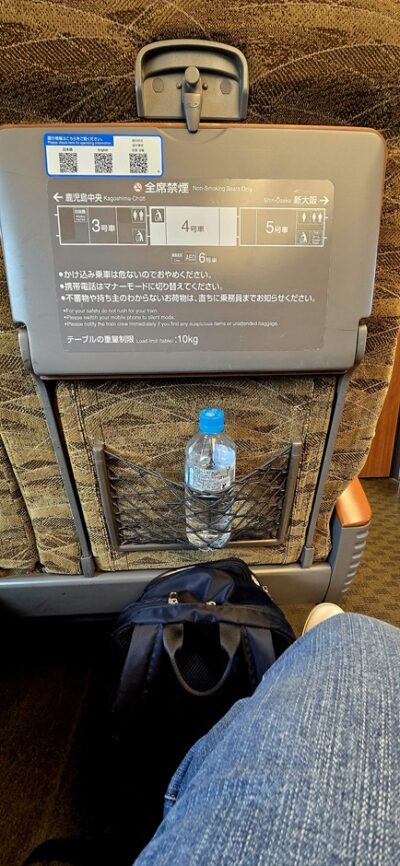
Typical seat in the ordinary car
Here, you will need to read and agree to the purchase requirements and state whether you have anyone under 16 needing parental consent. Then it’s time to enter the passport details for each traveler. It is absolutely critical you do not make any mistakes here, so please double and triple check your numbers after you enter them. Your JR Pass is linked to your passport, and you won’t be able to pick it up at the airport if the passport you present at the counter doesn’t agree to what you entered here. Once you have verified accuracy of your passport information, click “Confirm” and you will advance to the final screen.
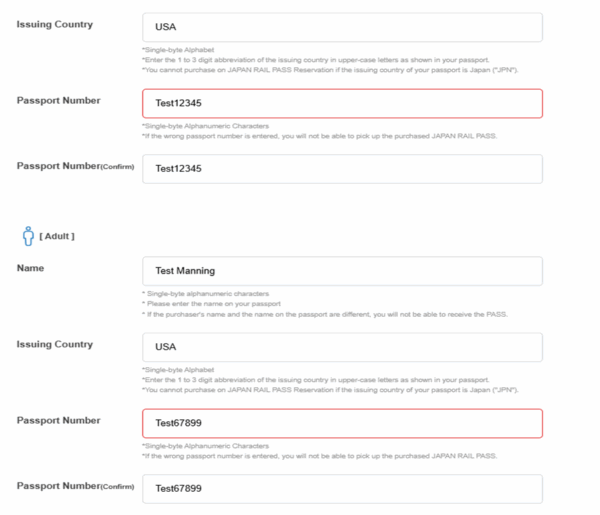
Screenshot via japanrailpass-reservation.net
Purchasing a Pass Step 2
On the final screen, review your information and then enter your credit card details for payment before hitting “Purchase”. Keep in mind, this is going to be charged in Japanese Yen to your credit card, so using a card with no foreign exchange fees would be preferred!
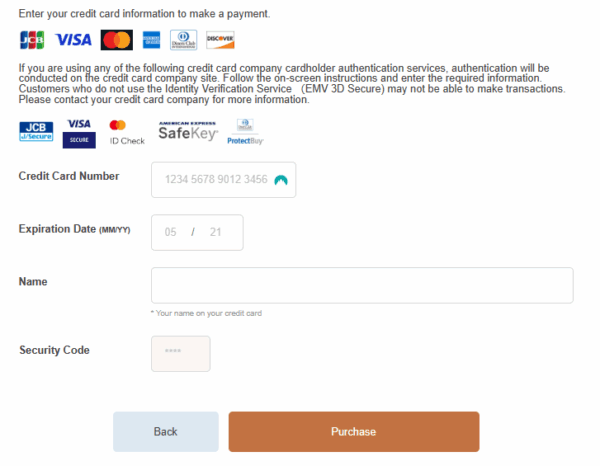
Screenshot via japanrailpass-reservation.net
Purchasing a Pass Step 3
How to Reserve Seats in Advance?
If you purchased your JR Pass from the official website, you can start determining which trains you want to take and reserve seats on those trains. You will want to log into your account and click on “My Menu” which will bring up the below screen. Click “Reserve Seat” to get started on reserving a train and a seat.
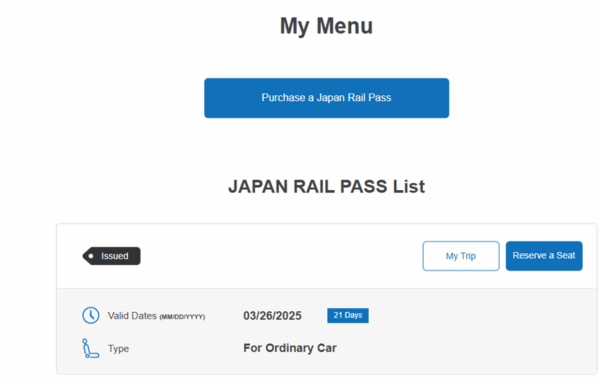
Screenshot via japanrailpass-reservation.net
Japan Rail Reservation Menu
Since I no longer have a valid JR Pass, I can’t show you screenshots of the next screens, but they are very simple to use. First, just like the JR Pass itself, you can only reserve trains/seats 30 days in advance. So, if you have a 21-day pass and are planning on traveling every single day, you will be logging on to reserve trains for 21 straight days starting 30 days from your first planned train trip. Once you click “Reserve Seat”, you’ll be brought to a screen where you need to enter the planned date of your reservation as well as the departure and arrival stations. You’ll also need to select a planned time of departure (keep in mind the site uses a 24-hour clock – not a 12-hour clock). You will then search for options, and it is almost always going to return 3 route options to you for review.
If you don’t like any of the route options, try changing your departure time to see if anything better comes up. Once you are satisfied with a particular route option, select it and you will be brought to a screen where you can let the system choose a seat(s) for you or you can select from a seat map. I always selected from a seat map. Once your seats are selected for the train or trains on your route, you will go to a review screen and then a confirmation screen. Congratulations – you have now booked your first JR train before you even arrived in Japan!
How do I pick up my JR Pass Upon Arrival in Japan?
In order to pick up your pass, there are two things you absolutely need to ensure you have with you:
1) Your “Purchase Complete Notification” e-mail (or exchange voucher if you purchased on a different website). You will get a Purchase Complete Notification e-mail upon purchase of your JR pass. It includes the reservation number for each person in your party which is a critical number to have in order for the JR Pass agents to find your reservation and issue your pass. I recommend printing it rather than just having it on your phone, but that would probably work as well.
2) Your passport with either a stamp or a sticker placed in it by a Japanese border control agent. When you go through border control and customs in Japan, you should receive either a stamp or a sticker in your passport that declares you are a temporary visitor. You absolutely have to have this in your passport when you go to pick up your JR pass. If for some reason you go through an automated machine at border control and never see an agent to get your stamp or sticker (not sure this is possible, but just in case), you will be denied your JR pass – no exceptions.
Once you have your stamp/sticker and have cleared customs and border control, simply proceed to a Japan Rail location to pick up your rail pass. In the Narita Airport, there are locations in all terminals and as you can see in the linked location list, there are locations in most train stations as well. So, you don’t necessarily have to pick it up at the airport, especially if you don’t need the rail pass on your arrival day. If you do pick it up though, it is not considered “active” until you first use it (i.e. your 7-, 14-, or 21-day clock will not start until you use the pass at a station).
How do I issue my seat reservation tickets?
What about all of those reservations you made before arriving in Japan? How do you actually issue those tickets? Well, you have two options:
1) You can go to a Japan Rail ticket machine, located in all JR stations and usually green colored (though some are blue) and issue your tickets on that machine. You will be looking for a machine that has a “Japan Rail Pass” button on the very bottom of the screen. If you don’t see that button, you are at the wrong machine. Once you tap that button and select your language of choice, you will come to a screen asking you what you want to do. Select the option for retrieving tickets reserved online. You’ll have to type in your passport number to confirm it is you and then you can select which train trip you want to issue tickets for. I recommend only issuing one or maybe two train trips at a time because once your tickets are “Issued”, you can’t change them without going to a ticket office. Your daily activities might go faster than expected and you might want to change to an earlier train (or they might go longer causing the need to change to a later train) which is easy to do online if you haven’t yet issued your tickets. You can change your tickets all the way up to 6 minutes before departure, so it is a very flexible system prior to printing the seat reservations.
2) If you can’t find a machine or have any issues, you can go to any JR ticket office (located in all JR stations) and have the representative issue your tickets there. You will just need to show your JR Pass and your passport. We did not experience any language barriers during our trip, so you shouldn’t worry about the agent not speaking English. Even if that occurred though, there is always Google Translate which works really well. Keep in mind, you could have to wait in line. Be sure to give yourself extra time if choosing this option.
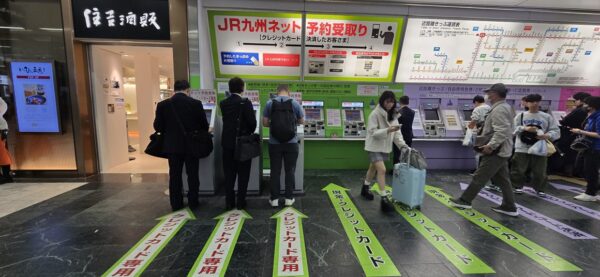
Scott grabbing our next seat reservation tickets
Can I change my JR train reservations?
As long as your reservations have not been “Issued” (i.e. you don’t have a printed ticket with your train and seat number on it), you can make any change you want up until 6 minutes before departure. You can make those changes on a machine or on the official website. Once a ticket has been issued, you can still change it, but that will have to be done by a representative at a JR ticket office within the station you are located at.
Once I have my reservation tickets, how do I use them?
Once you have issued your seat reserved tickets, it is time to head for the automated gates (or human controlled gate in the case of very small stations). These are some seriously sophisticated machines. You’ll need to find a machine that allows you to insert tickets (some of them are IC smart card tap only). Simply insert BOTH your JR Pass and your reserved seat ticket together at the same time (one on top of the other, doesn’t matter what is on top and bottom). They will both shoot out at the other end of the machine. The number of tickets returned to you will display. Pick them up and confirm you received the correct number of tickets. When your train ride is complete and you are exiting at your destination station, you will do the same thing – insert both tickets on top of each other. The machine will return your JR Pass only and will keep the reserved ticket that is no longer needed.
If you have a transfer station before your destination and are required to go through a “transfer gate”, you’ll insert three tickets all at once – your JR Pass, your previous train ticket, and your upcoming train ticket. The machine will sort through all of these and return your JR Pass and your upcoming train ticket to you while keeping your completed train ticket. These machines are so smart, that you can actually insert up to 4 tickets together on top of each other and it will sort out which ones are relevant and which ones aren’t and return the others to you.
Can I ride trains with my JR Pass and no seat reservations?
In most cases, yes! which gives you the ultimate flexibility. Almost all JR trains have “non-reserved” cars. You can find out which cars are non-reserved by looking at the upcoming departures board in each train station as they will show which cars are non-reserved. I can’t remember any JR train that we took that was fully reserved. You just have to make sure you are at the station and lined up early at the car of your choice. Every car has one or two designated line areas. The Japanese are serious about their lines, this is not an American airport where you can cut the line or crowd together to rush into a car. The non-reserved cars have first come first serve seating. It is possible the car might already be full unless you are boarding at the start of a route. That being said, every time we took a non-reserved car, we were able to get a seat without issue. If your plan is to take a non-reserved car on a train, you only need to insert your JR Pass at the automated machine gates as it acts as your train ticket as well in this instance.
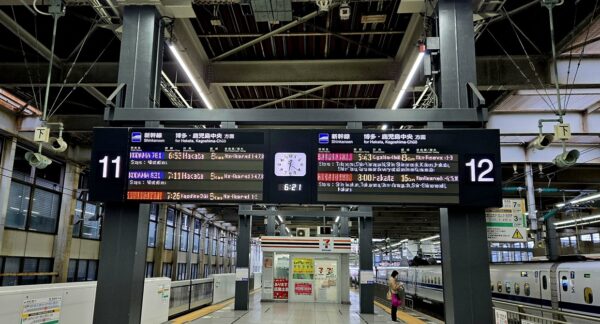
Typical board on the platform. Note the Non-Reserved Cars
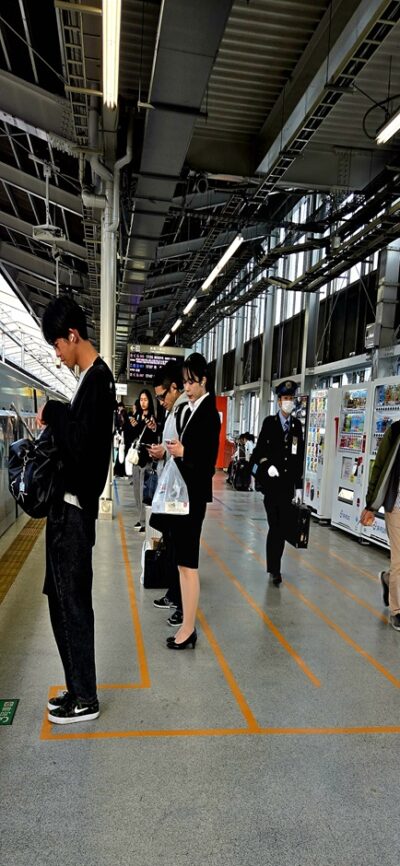
Tape on the ground showing where the lines should form
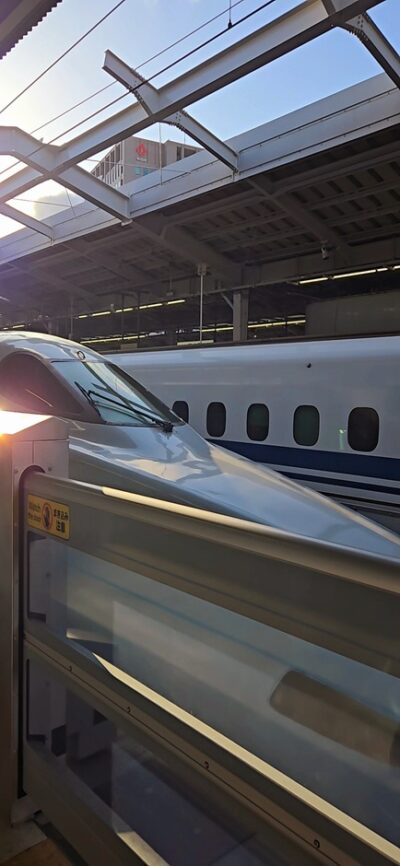
Shinkansen
Are there certain JR trains I cannot take with the JR Pass?
Yes, you cannot take any Nozomi or Mizuho train without paying an upcharge fee in a JR ticket office. These trains tend to be fully reserved seat trains with limited stops. There are also a ton of these, so make sure you don’t accidently get on one unless you have paid an upcharge. You also can’t take any non-JR trains, such as the Fujikyu Railway out to Mt. Fuji as it is considered a private railway. What you can do for Mt. Fuji is use your JR Pass to get out to Otsuki Station and then buy a Fujikyu ticket at a machine (cash only) to get you the rest of the way and then do the same thing in reverse order on the way back. This keeps you from needed to pay the full fare from Tokyo which is much more expensive.
What happens if I lose my JR Pass while I am in Japan?
Cry…We’re not kidding – if you lose the pass, JR will NOT replace it. You are completely out of luck if this happens, so guard the pass with your life. You will have to pay for the remaining JR trains individually for the rest of your trip. No refund for the lost portion of your itinerary. This was also a factor in our decision to purchase the country-wide pass vs. the regional passes given that the prices were comparable for our trip.
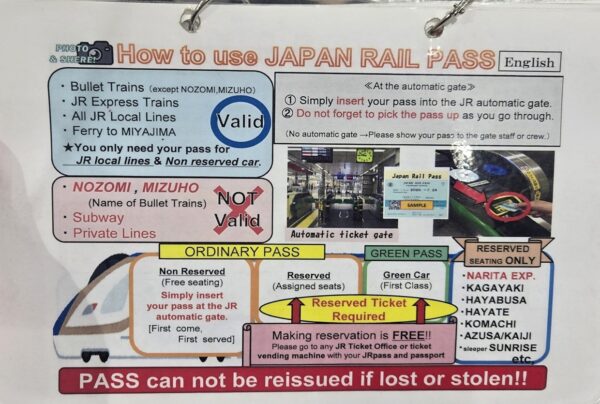
JR Pass Cheat Sheet
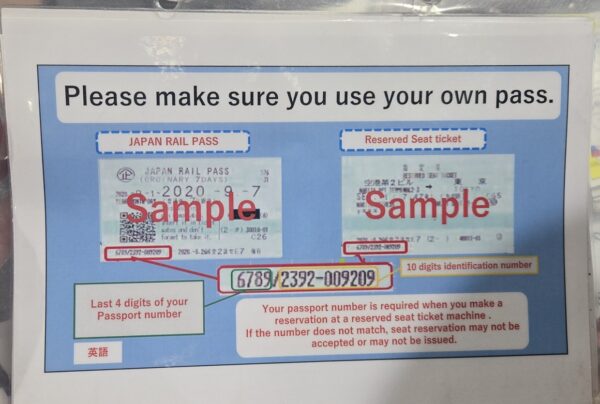
Sample JR Pass & Reserved Seat Ticket
We hope you found this information helpful. We know it can seem a bit overwhelming at first for those who aren’t accustomed to taking public transportation in their daily lives, but we are confident that you’ll fall in love with the efficiency, comfort, and cleanliness of the Japan Rail lines. Don’t hesitate to reach out with any questions.
Been to Japan and used a JR Pass? Let us know if we forgot anything by leaving a comment below.

Leave A Comment
You must be logged in to post a comment.